Sewing Machine Guide
The Singer Heavy Duty sewing machine can be used for sewing a variety of materials. Since the use cases for sewing machines are so varied, this guide only covers setup and basic use. However, any sewing instructions intended for domestic sewing machines will apply to the Singer Heavy Duty.
Threading the needle
To begin, make sure the metal foot around the needle is raised off of the plate of the machine. The foot can be raised using the plastic lever in the back of the machine.
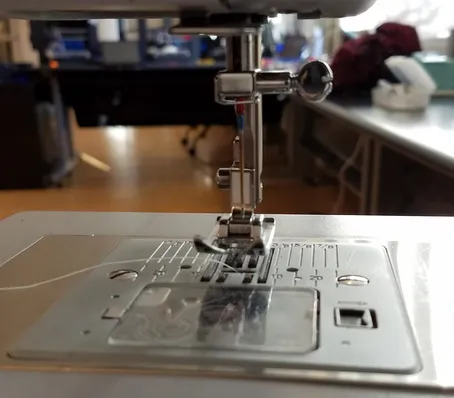
Using the manual dial on the right side of the machine, raise the needle until the metal hammer becomes visible at the top of the machine.
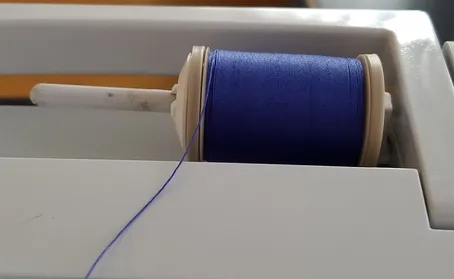
Place the thread you plan to use on the horizontal peg on top of the machine. Place the spool holder plastic ring on the peg to hold the spool on.
Pull the thread through the small metal guide, then through the large clip next to it.
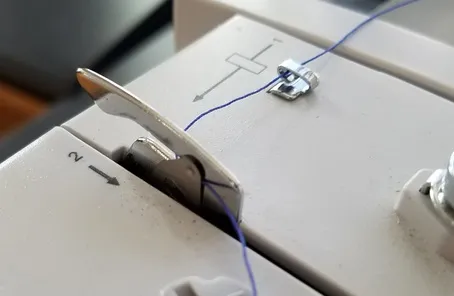
Bring the thread down through the right groove, around the plastic at the bottom, then back up the left groove.
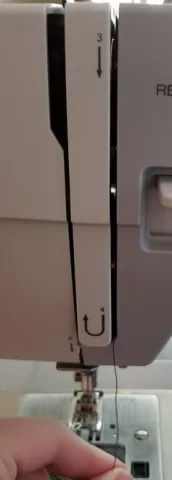
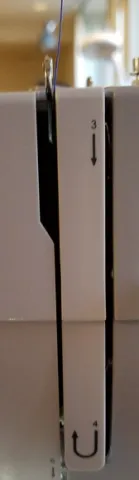
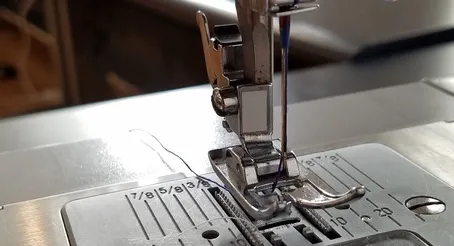
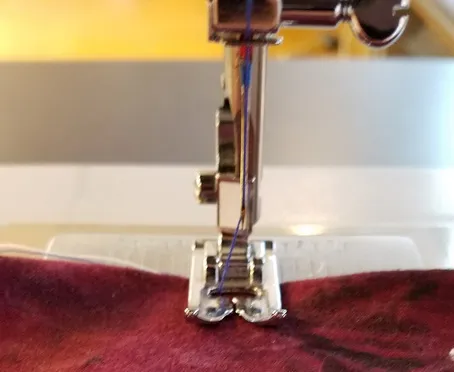
Pull the thread from right to left through the eyelet on the hammer.
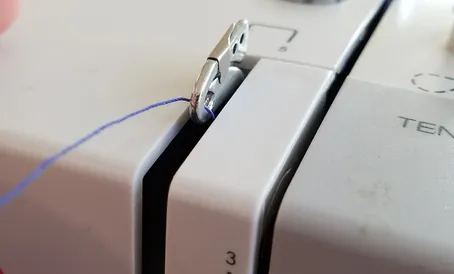
Pull the thread back down through the left groove. Make sure the thread passes behind the large metal hook at the end of the groove, then through the small hook at the top of the needle.
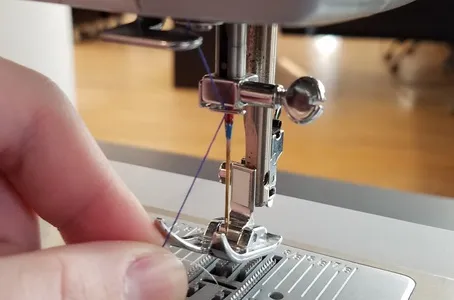
Thread the needle from front to back, making sure the thread does not loop around the needle. Pull the thread through the slot on the foot, and slide a few inches excess towards the back of the machine.
The needle is now threaded.
Preparing the bobbin
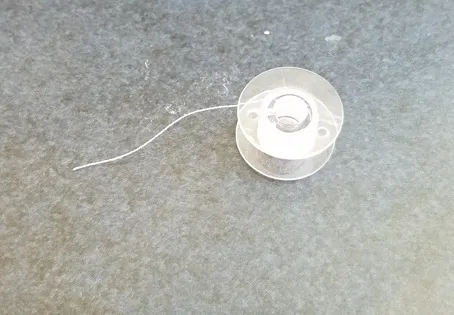
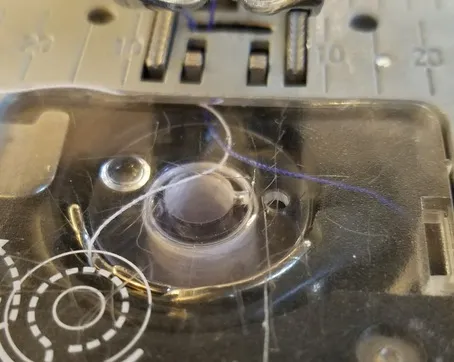
The bobbin is the small spool of white thread located in the compartment under the needle. Most sewing problems come from the bobbin being incorrectly threaded, so follow these instructions carefully and always check the bobbin before sewing.
Threading the bobbin
Begin by opening the bobbin compartment, and laying out the bobbin so that the thread turns counter-clockwise around it.
Place the bobbin in the compartment, holding on to the thread at the end. Slide this thread into the groove at the front of the metal piece of the bobbin compartment.
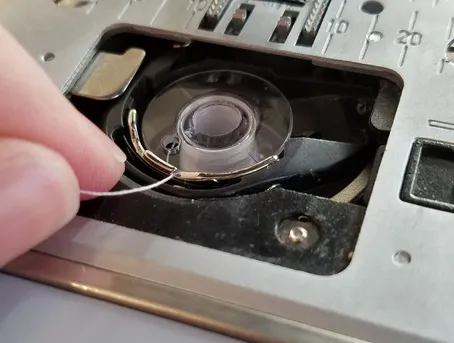
Pull the thread to the left, so that it slides into the groove of the metal piece.

Pull a few inches of bobbin thread out the back of the bobbin compartment, and place the cover back on the compartment.
The bobbin is now threaded, but the machine is not quite ready to go. Follow the next section's instructions to finish
Raising the bobbin thread
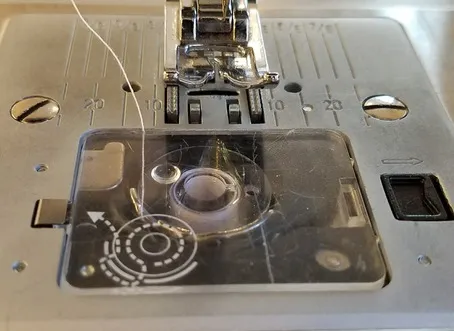
The bobbin thread needs to be pulled through the gap in the metal plate for the machine to sew. For these instructions to work, the needle must already be threaded.
Hold on to the end of the upper thread from the needle, and turn the manual dial towards you (counterclockwise).
The thread will be pulled into the plate. At some point, you will see the upper thread loop around the bobbin thread.
Keep turning the manual dial until the end of the upper thread pulls freely. Pull until the upper thread comes out of the plate, raising the bobbin thread with it.
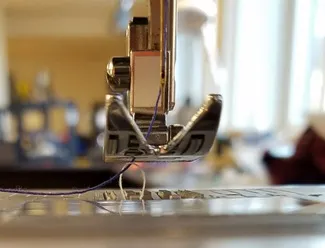
Carefully grab the bobbin thread, and pull a few inches of it under the foot and off to the side.
The sewing machine is now ready to use.
Sewing
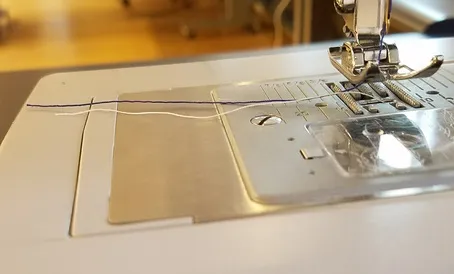
First, power on the machine using the switch on the right side. Use the manual dial on the right to raise the needle to full height. Place your fabric under the foot, and use the lever on the back of the machine to drop the foot to secure the material.
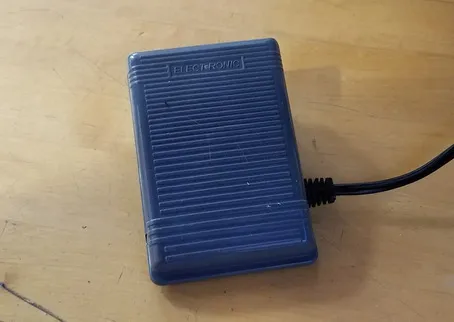
Use the foot pedal to drive the machine. Pressing harder will cause the machine to sew faster. Use your hands on either side of the needle to guide the fabric.
When you finish sewing, turn the manual dial clockwise away from you until the needle rises to its maximum height. Raise the foot and pull the fabric gently our from the machine.

Cut both threads, and your sewing is complete!